Low Calorie Ice Cream That Ended My Late-Night Pint Habit
Every night ended the same way: me on the couch with a full pint of something rich and frozen, telling myself I’d stop halfway through and knowing I wouldn’t. I needed a real alternative, not a smaller portion of the same thing, but something that actually felt worth eating. What I found was a homemade low calorie ice cream made from frozen bananas, and it genuinely replaced the habit without feeling like a compromise. By the end of this article, you’ll have three frozen dessert formats, four complete recipes, and the exact technique that makes all of it work.
Why Store-Bought Low Calorie Ice Cream Disappoints
I remember standing in the freezer aisle one evening, reading the back of a tub that promised all the indulgence with a fraction of the calories, and feeling quietly lied to. The ingredients list was long and strange, full of sweeteners that left a chemical aftertaste lingering for ten minutes after each spoonful. The texture was off too, somewhere between foam and actual cream, never quite landing on either. And the serving size printed on the front? About a third of what I’d actually eat in one sitting, which made the calorie math a lot less reassuring than it looked on the shelf.
Calorie math that actually holds up across a full day is a different conversation entirely. My 1800 calorie meal plan for weight loss maps out exactly how breakfast, lunch, dinner, and dessert fit together without the store-bought guesswork.
The alternative I landed on was frozen banana nice cream, and it’s genuinely not the same category of thing.
What Home-Made Actually Gives You
Making your own healthy ice cream at home means you know every single thing in the bowl. There’s no maltitol, no guar gum, no “natural flavors” that could mean anything. The sweetness comes entirely from ripe bananas, which are naturally high in sugar at peak ripeness, and that sweetness tastes real because it is.
The texture is also completely different from anything store-bought. A processed light ice cream is engineered to hold air and stay soft in fluctuating freezer temperatures. A blended frozen banana is just cells releasing their moisture and fat under pressure, which creates a dense, cold creaminess that actually coats your mouth the way real ice cream does.
Beyond texture and ingredients, there’s the satisfaction factor. A bowl made from three bananas with your favorite add-ins takes maybe five minutes to prepare and feels genuinely full and complete, not like you just ate the idea of dessert.
Dessert that actually satisfies without the aftermath is exactly what my healthy dessert recipes collection is built around, everything from frozen formats to no-bake options worth reaching for.
The No-Machine Method: Frozen Bananas Are the Whole Secret
The moment I put a frozen banana into a food processor for the first time, I expected mush. What actually came out after two minutes of blending was smooth, pale, and genuinely creamy in a way I didn’t expect from a single piece of fruit. I stood at the counter eating it straight from the bowl, slightly confused and very pleased.
The science behind it is real. When a banana freezes, the water inside the cells turns to ice crystals, and when those crystals are broken down by the blades of a food processor, they release moisture that combines with the natural fruit sugars and the tiny amount of fat in the banana to create something that behaves like a soft, cold emulsion.
One important note: a blender doesn’t do the same job. A blender needs liquid to work and will either seize up or push too much air into the mixture. A food processor has the torque to handle solid frozen fruit and will give you a far superior result.
The Technique That Makes It Work
Slice your bananas before you freeze them. This sounds minor but it makes a real difference because smaller pieces process more evenly and you avoid having to stop and wrestle with a whole frozen banana.
Freeze for a minimum of four hours. Less than that and the banana is still soft enough to blend into baby food rather than ice cream. Overnight is honestly ideal.
Start the processor and let it run for thirty seconds. The banana will break down into a crumbly, almost grainy texture first. Don’t stop here. Scrape down the sides with a spatula and run it again for sixty seconds. That second run is where the creaminess happens, where it goes from broken-up pieces to something soft, cold, and genuinely silky.
The result is something my friend tried once, fully convinced I’d made a proper soft serve. She asked what brand of machine I used. I didn’t have one.
The Soft-Serve Version I Make Every Week
Mint chocolate chip was not my first choice. I went through plain banana, then chocolate, then a berry version before I landed on mint chocolate chip one evening when I had peppermint extract in the cupboard and felt like experimenting. One taste and I stopped experimenting. That was the version.
The reason it works so well is that peppermint extract amplifies the cold. The nice cream is already cold, obviously, but a small amount of peppermint extract creates a cooling sensation on the palate that makes it feel even colder than it is. Paired with the creamy banana base and the crunch of dark chocolate chips, it hits every textural and temperature note you want from a real soft serve.
Peppermint extract is powerful. Start with a quarter teaspoon and taste before you add more. I made the mistake of being generous once and ended up with something that tasted like toothpaste. A quarter teaspoon is usually exactly right.
Why Spinach Belongs in This Recipe
The spinach trick is something I resisted for a long time because it sounded wrong. It isn’t. A small handful of fresh spinach blended in with the frozen banana gives the nice cream a beautiful natural green color, the kind of green that looks like mint ice cream should look, without contributing any flavor whatsoever.
The key is blending the spinach fully before adding your other ingredients, and making sure it’s fresh spinach rather than frozen, which can carry excess water and affect the texture. Once it’s fully broken down, you won’t see it and you won’t taste it. You’ll just have a bowl that looks the part.
Here is the recipe I come back to every single week.
Mint Chocolate Chip Nice Cream
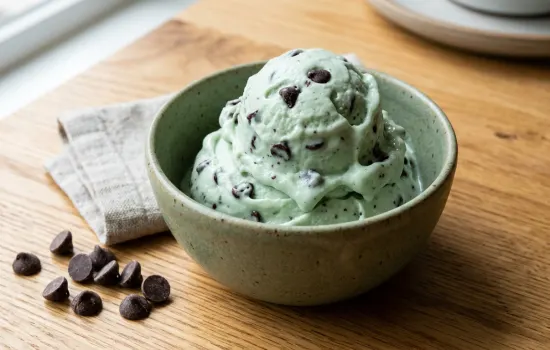
Serves 2 | approx 190 kcal per serving | 3g protein | 39g carbs | 4g fat | 5 min + 4 hrs freeze
Ingredients:
- 3 frozen bananas, sliced before freezing (270g)
- 1/4 tsp peppermint extract
- 1 handful fresh spinach (20g, for color, undetectable in taste)
- 2 tbsp dark chocolate chips (24g)
- 1 tbsp oat milk if needed to loosen
Method:
- Place frozen banana slices and spinach in a food processor and blend 30 seconds until crumbly.
- Scrape down the sides and blend again for 60 seconds until completely smooth and creamy.
- Add peppermint extract and blend 10 seconds. Taste and add more only if needed, it is strong.
- If the mixture is too thick, add oat milk one teaspoon at a time and blend briefly.
- Fold in chocolate chips by hand so they stay whole.
- Serve immediately for soft serve texture, or transfer to a freezer container and freeze 1 hour for a firmer scoop.
Flavor Variations That Actually Work (Chocolate, Berry, Peanut Butter)
After about two weeks of straight banana nice cream, the novelty wore off. That’s the honest truth. The base was good, the technique was solid, but I needed the bowl to feel different each time or I knew I’d drift back to old habits. So I started testing, one variation at a time, adding things to the base and keeping whatever worked.
Having a wider rotation of lighter sweet options is what keeps the drift from happening. My healthy snack bars collection is the other thing I reach for when the craving is real but I want something I can eat without thinking twice.
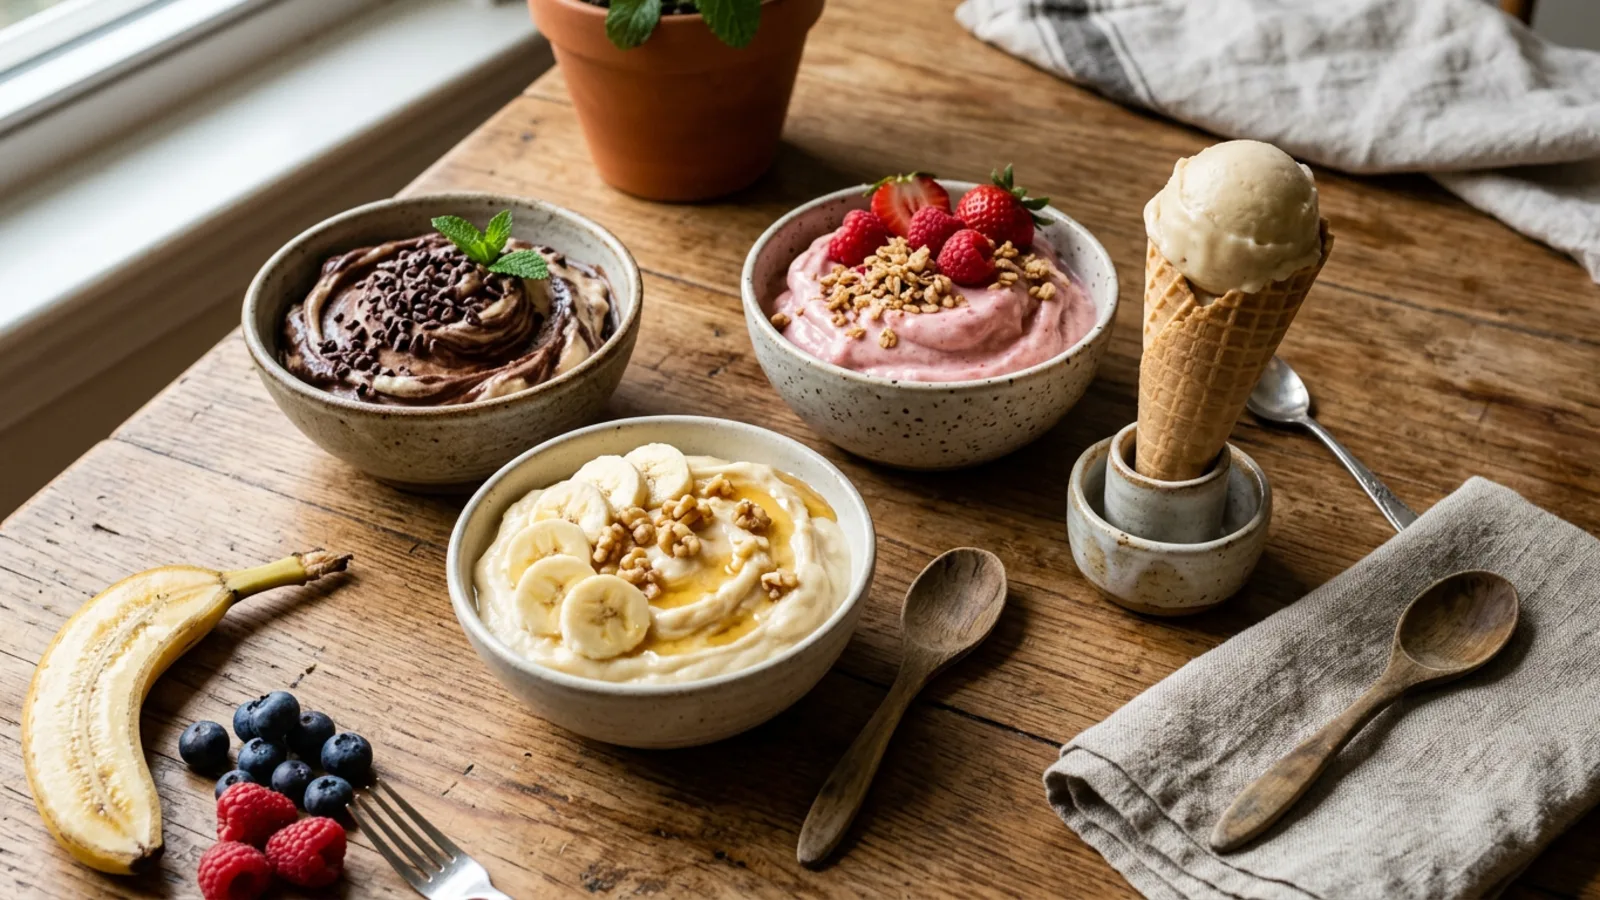
The dark chocolate version is the most straightforward. Add a tablespoon of raw cacao powder to the food processor with the banana and blend it in during the second pass. A pinch of sea salt added at the same time lifts the bitterness of the cacao into something that tastes like a proper chocolate soft serve. It’s simple, and it’s one of the best guilt free ice cream versions in the rotation.
The berry version has a completely different character. Blend two large frozen bananas with a generous handful of frozen raspberries, and what you get is sharper, fruitier, and a little icier in texture, closer to a sorbet than a soft serve. The color is a deep pink and the flavor is genuinely tart in the best way.
The One That Surprised Me Most
The peanut butter version is the one I didn’t expect to love as much as I do. The cacao powder makes it dark and rich. The peanut butter makes it dense in a way that plain banana never is. And the sea salt does something almost mysterious to the whole mixture, turning what could be a simple blended snack into something that genuinely feels indulgent.
The texture is the thing. It comes out thick and fudgy rather than creamy, closer to a cold brownie batter than a soft serve, and it holds its shape when you scoop it. It is the most satisfying version I’ve made, and it’s become the one I make when I want dessert to actually feel like dessert.
Peanut Butter Chocolate Fudge Nice Cream
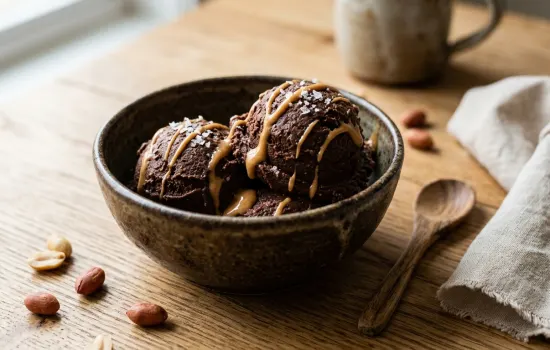
Serves 2 | approx 250 kcal per serving | 7g protein | 40g carbs | 9g fat | 5 min
Ingredients:
- 3 frozen bananas (270g)
- 2 tbsp natural peanut butter (32g)
- 1 tbsp raw cacao powder (8g)
- 60ml oat milk
- 1 tsp honey
- Pinch of sea salt
Method:
- Add frozen bananas and oat milk to food processor and blend 30 seconds until broken down.
- Add peanut butter, cacao powder, honey, and sea salt.
- Blend 60 seconds, scraping down the sides twice, until completely smooth, dark, and fudgy.
- Serve immediately for soft serve texture, or freeze 1 hour for a scoopable consistency.
- Top with a small drizzle of peanut butter and a pinch of flaky salt before serving.
The Frozen Format That Changed Everything
Nice cream is wonderful, but it has one limitation I ran into almost immediately: it softens quickly, especially in summer, which means you have to eat it fairly fast. That’s fine when you’re hungry and ready, but sometimes I wanted something I could actually take my time with. That’s when I discovered yogurt bark, and it changed the whole dessert rotation.
The concept is almost absurdly simple. You spread thick Greek yogurt in a thin layer across a sheet of parchment paper, add your toppings, and freeze it solid. What comes out two hours later is not yogurt anymore. It snaps when you break it. The texture of cold, set yogurt against jammy roasted strawberries and dark chocolate chips is genuinely one of the better better-for-you ice cream textures I’ve encountered, because nothing about it feels like a compromise.
The roasting step is what separates this version from a decent result to something genuinely worth making. The heat concentrates the flavor and collapses the fruit slightly into something sweet and almost jam-like, and that contrast against the clean cold yogurt is what gives each shard its character.
Roasted Strawberry Frozen Yogurt Bark
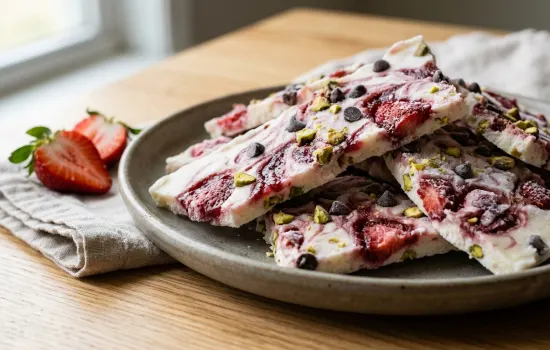
Serves 4 | approx 165 kcal per serving | 11g protein | 21g carbs | 5g fat | 10 min + 2 hrs freeze
Ingredients:
- 400g Greek yogurt (full fat or 2%)
- 200g fresh strawberries, halved
- 2 tbsp honey (42g)
- 1 tsp vanilla extract
- 30g dark chocolate chips
- 1 tbsp crushed pistachios (10g)
Method:
- Preheat oven to 200 °C. Place strawberries on a baking tray, drizzle with 1 tbsp honey, and roast 15 minutes until jammy and slightly caramelized. Leave to cool completely.
- Mix Greek yogurt, remaining honey, and vanilla in a bowl until smooth.
- Line a baking tray with parchment paper and spread yogurt mixture into a thin even layer about 1cm thick.
- Spoon roasted strawberries over the top and swirl gently with a knife. Scatter dark chocolate chips and crushed pistachios over everything.
- Freeze uncovered for minimum 2 hours until completely solid.
- Break into irregular shards and serve immediately straight from the freezer.
That chilled, creamy texture is a whole category worth exploring. My chilled cream collection takes it further with recipes built entirely around cold desserts that feel genuinely indulgent.
And Then There Are Ice Pops
Ice pops solve a different problem entirely: portion control. When nice cream is in a container in the freezer, I have to actively stop myself from going back for more. With ice pops, each one is its own serving, already measured, already set, ready to pull out and eat without any decision-making involved.
The mango and coconut combination is one I’ve been making for two summers now. Frozen mango blended with light coconut milk comes out extraordinarily creamy for something that contains no dairy, because the natural fiber in the mango acts as a mild thickener and the coconut fat fills in the creaminess gap. A squeeze of lime brightens everything and stops it from tasting flat. The optional pinch of chili flakes on top sounds unusual, but the gentle heat against the cold sweet mango is one of those combinations that makes people do a small surprised pause before reaching for a second one.
This is one of the cleanest low calorie ice cream formats I know, and it’s been a constant in my freezer every summer since I first made it.
Mango Coconut Cream Ice Pops
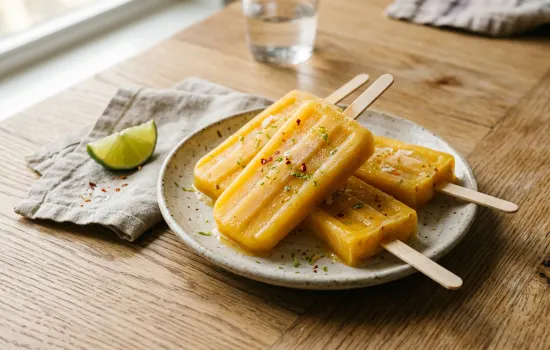
Serves 6 | approx 65 kcal per pop | 2g protein | 13g carbs | 2g fat | 10 min + 4 hrs freeze
Ingredients:
- 400g frozen mango chunks
- 200ml light coconut milk
- 1 tbsp lime juice (15ml)
- 1 tbsp honey (21g)
- 1 tsp lime zest
- Pinch of chili flakes (optional)
Method:
- Add all ingredients to a blender and blend 60 seconds until completely smooth and pourable.
- Taste and adjust honey or lime juice to your preference.
- Pour mixture into ice pop moulds, leaving a small gap at the top for expansion.
- Insert sticks and freeze minimum 4 hours or overnight.
- To unmould, run warm water over the outside of the mould for 10 seconds and pull gently.
- Serve straight from the freezer. Optional: dip in melted dark chocolate and refreeze 15 minutes for a chocolate shell.
That mango and coconut pairing translates just as well into drinkable form. My tropical smoothie recipes collection runs on that exact combination, cold, fruity, and genuinely light.
The Night I Stopped Buying Pints
That late-night pint habit didn’t disappear because I forced myself to stop. It faded because what I made at home started feeling better than what I was buying. A bowl of homemade low calorie ice cream made from frozen banana with dark chocolate folded in was colder, creamier, and more satisfying than anything I was pulling off a freezer shelf. It just took me longer than I’d like to admit to figure that out.
Now my freezer has sliced bananas in a bag, a tray of yogurt bark at any given point in the season, and a stack of mango ice pops waiting for warm evenings. The late-night craving still comes. I just know exactly what to do with it.
The cold and sweet without the regret theme runs through more than just frozen desserts. My piece on low calorie smoothies covers the drinkable side of that same habit, worth reading if the blender gets as much use as the food processor.
More frozen dessert recipes built the same way live inside my healthy ice cream collection, worth exploring when you want to go beyond the four here.
New recipes and dessert ideas show up in the newsletter every now and then, worth joining if this kind of cooking is what you are after.
Mounir, Healthy lifestyle creator at LeanLife Journey.